Creds Guide
This document aims to guide you through the process of creating a Discord account for your bot (the Discord Bot application), and inviting that account into your Discord server.

Log in with your Discord account.
Click New Application.
Fill out the
Namefield however you like.Go to the Bot tab on the left sidebar.
Click on the
Add a Botbutton and confirm that you do want to add a bot to this app.Optional: Add bot's avatar and description.
Copy your Token to
creds.ymlas shown above.Scroll down to the
Privileged Gateway IntentssectionEnable the following:
PRESENCE INTENT
SERVER MEMBERS INTENT
MESSAGE CONTENT INTENT
These are required for a number of features to function properly, and all should be on.
Getting Owner ID*(s)*:
Go to your Discord server and attempt to mention yourself, but put a backslash at the start (to make it slightly easier, add the backslash after the mention has been typed).
For example, the message
\@fearnlj01#3535will appear as<@145521851676884992>after you send the message.The message will appear as a mention if done correctly. Copy the numbers from it
145521851676884992and replace the big number on theOwnerIdssection with your user ID.Save the
creds.ymlfile.If done correctly, you should now be the bot owner. You can add multiple owners by adding them below the first one. Indentation matters.
For a single owner, it should look like this:
For multiple owners, it should look like this:
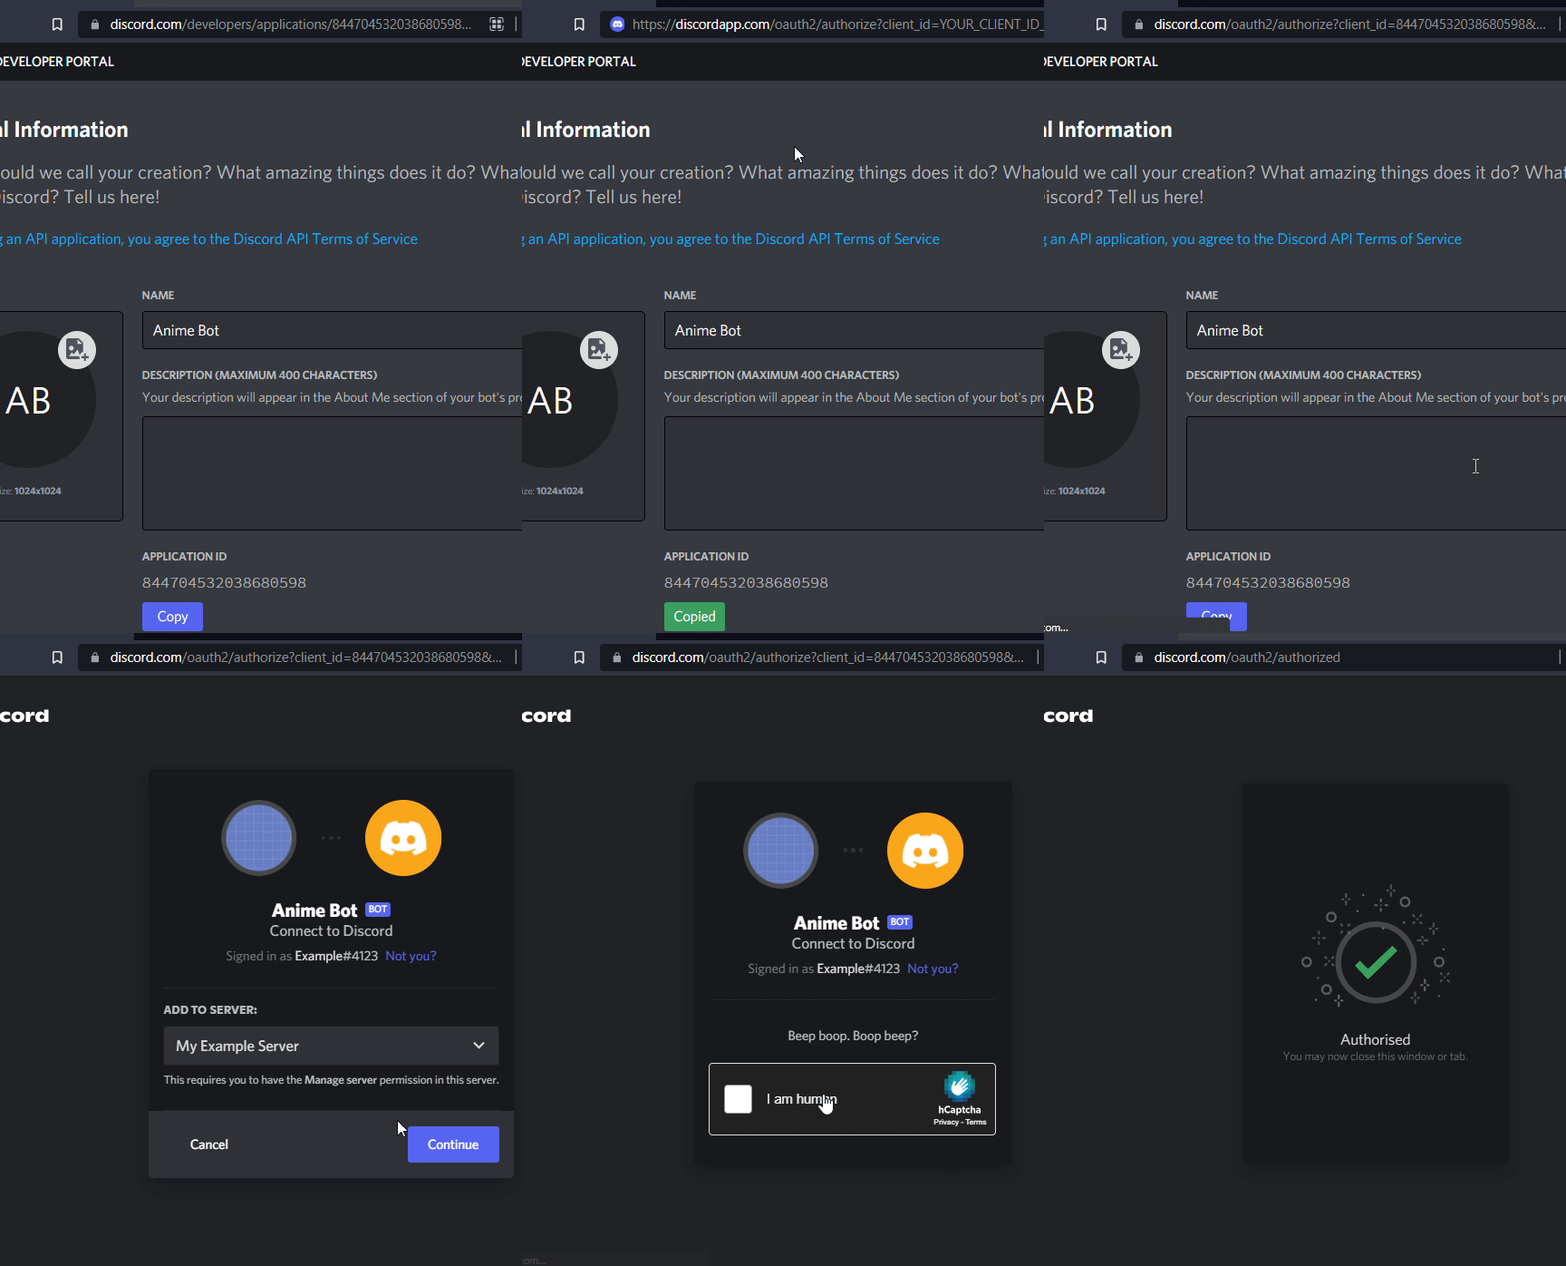
Inviting your bot to your server

On the General Information tab, copy your
Application IDfrom your applications page.Replace the
YOUR_CLIENT_ID_HEREin this link:https://discordapp.com/oauth2/authorize?client_id=YOUR_CLIENT_ID_HERE&scope=bot&permissions=66186303with yourClient IDThe link should now look something like this:
https://discordapp.com/oauth2/authorize?client_id=123123123123&scope=bot&permissions=66186303Access that newly created link, pick your Discord server, click
Authorizeand confirm with the captcha at the endThe bot should now be in your server
That's it! You may now go back to the installation guide you were following before 🎉
Last updated
Was this helpful?